Day16 Java프로그래밍 기초(클래스)
1. 클래스
1.1 클래스의 기본 개념
- 클래스는 메서드를 분류 및 데이터 타입 정의를 위해 사용한다.
- 메서드 분류 : 코드 유지보수성을 위해 사용
- 데이터타입 정의 : 기본 자료형외의 데이터 타입을 관리 하기 위해 사용한다. (User-defined Data Type)

2. 메서드 분류
2.1 클래스필드와 인스턴스필드
- 클래스 필드 : static필드 라고도 불리며 클래스 변수는 클래스당 1개만 존재
- 인스턴스 필드 : non-static필드 라고도 불리며 인스턴스 변수를 동적할당을 통해 여러개 생성
2.2 클래스필드
- 클래스 필드는 변수를 1개만 생성할 수 있다.
- static 필드를 사용한다.
클래스 필드의 형식
class Calculator{ static int result; }
main(String[] args){ Calculator.result; }
예제
- 클래스 필드는 클래스명.메서드(); 로 사용한다.
- 한번에 한개의 클래스만 사용 가능하다.
package study.oop.clazz;
public class Test01 { public static void main(String[] args) { Calculator.plus(2); Calculator.plus(3); Calculator.minus(1); Calculator.multiple(7); Calculator.divide(3);
1
2
  System.out.printf("result = %d\n", Calculator.result);
}   }
- 클래스의 필드의 변수를 static으로 선언해야한다.
- static 메소드는 static으로 선언된 변수와 메서드만 접근 가능하다.
1
2
3
4
5
6
7
8
9
10
11
12
13
14
15
16
17
18
19
20
21
22
package study.oop.clazz;

public class Calculator {

  static int result = 0;

  static void plus(int a) {
    result += a;
  }

  static void minus(int a) {
    result -= a;
  }

  static void multiple(int a) {
    result *= a;
  }

  static void divide(int a) {
    result /= a;
  }
}
2.3 인스턴스필드
- 인스턴스 필드는 new를 통해 Heap영역에 할당한 만큼 생성 가능하다
-인스턴스 필드는 non-static으로 선언한다.
인스턴스 필드의 형식
class Calculator{ int result = 0; }
main(String[] args){ Calculator.c1 = new Calculator(); }
- 예제
- 인스턴스 필드는 클래스명 변수 = new 클래스명 (); 으로 선언한다.
- 객체가 인스턴스 된 후에 변수의 레퍼런스를 사용하여 메서드에 접근 한다.
package study.oop.clazz;
public class Test01 { public static void main(String[] args) { Calculator c1 = new Calculator();
1 2 3 4 5 6 7 8
Calculator.plus(c1, 2); Calculator.plus(c1, 3); Calculator.minus(c1, 1); Calculator.multiple(c1, 7); Calculator.divide(c1, 3); System.out.printf("result = %d\n", c1.result); } } - static 메서드에 접근을 하려면 static 필드의 변수나 메소드로 접근해야한다.
- static 메서드에 Calculator that의 레퍼런스를 넘겨 참조를 할 수 있게 한다.
package study.oop.clazz;
public class Calculator {
1
2
3
4
5
6
7
8
9
10
11
12
13
14
15
16
17
int result = 0;

static void plus(Calculator that, int a) {
  that.result += a;
}

static void minus(Calculator that, int a) {
  that.result -= a;
}

static void multiple(Calculator that, int a) {
  that.result *= a;
}

static void divide(Calculator that, int a) {
  that.result /= a;
}   }
2.3 this활용
- static 메서드를 접근 하려면 인스턴스 필드의 레퍼런스를 매개변수로 넘겨야한다.
- non-static 메서드를 선언하면 컴파일러 내부에서 this 레퍼런스를 생성하여 자동으로 넘긴다.
- this 참조는 객체 수준에서 접근 가능하다
- static으로 선언된 필드와 메소드는 클래스 단위에서 생성 되기 때문에 접근 불가하다.
- ex) Cal c1, Cal c2에서 this는 각각 c1,c2의 레퍼런스를 의미 하지만
- ex) static은 Cal을 의미하므로 this로 접근 할 수 없다.
1
2
3
4
5
6
7
8
9
10
package study.oop.clazz;

public class Calculator {
    인스턴스 필드 생성
    클래스 필드 생성

    인스턴스 메서드 생성 -> this 포인터로 참조가능
    클래스 메서드 생성 -> 클래스 필드로 접근(this 포인터로 접근 불가)

}
예제
package study.oop.clazz;
public class Test01 { public static void main(String[] args) { Calculator c1 = new Calculator();
1
2
3
4
5
6
7
8
  c1.plus(2);
  c1.plus(3);
  c1.minus(1);
  c1.multiple(7);
  c1.divide(3);

  System.out.printf("result = %d\n", c1.result);
}   }
package study.oop.clazz;
public class Calculator {
1
2
3
4
5
6
7
8
9
10
11
12
13
14
15
16
17
18
19
20
int result = 0;

void plus(int a) {
// c1의로 객체가 인스턴스 된다면
// c1객체의 레퍼런스가 this
// c1.result와 동일
  this.result += a;
}

void minus(int a) {
  this.result -= a;
}

void multiple(int a) {
  this.result *= a;
}

void divide(int a) {
  this.result /= a;
}   }
3. 데이터 타입 정의(User-define Data Type)
3.1 데이터 타입을 만드는 이유
- 데이터 타입을 정의 하지 않으면, 서로 다른 타입의 자료형을 중복해서 사용해야한다.
- 코드의 유지보수 측면에서 비효율적이다.
1
2
3
4
5
6
7
8
9
10
11
12
13
14
15
16
17
18
19
20
21
22
23
24
25
26
27
28
29
30
31
32
33
34
35
36
37
38
39
40
41
42
package com.eomcs.oop.ex02.step11;

    // 데이터 타입 정의
    // 1) 클래스 사용전: 낱개 변수 사용
    //
    public class App {
      public static void main(String[] args) {
        String name;
        int kor;
        int eng;
        int math;
        int sum;
        float aver;

        name = "홍길동";
        kor = 100;
        eng = 90;
        math = 85;
        sum = kor + eng + math;
        aver = (float) sum / 3;

        System.out.printf("%s: %d, %d, %d, %d, %.1f\n", name, kor, eng, math, sum, aver);

        name = "임꺽정";
        kor = 90;
        eng = 80;
        math = 75;
        sum = kor + eng + math;
        aver = (float) sum / 3;

        System.out.printf("%s: %d, %d, %d, %d, %.1f\n", name, kor, eng, math, sum, aver);

        name = "유관순";
        kor = 80;
        eng = 70;
        math = 65;
        sum = kor + eng + math;
        aver = (float) sum / 3;

        System.out.printf("%s: %d, %d, %d, %d, %.1f\n", name, kor, eng, math, sum, aver);
      }
    }
3.2 클래스 만들기
- 위 코드에서 name,kor,eng,math,sum, aver, printf를 중복해서 사용한다.
- 이를 해결하기 위해 아래와 같은 클래스를 만든다.
1
2
3
4
5
6
7
8
9
10
package study.oop.clazz;

public class Score {
  String name;
  int kor;
  int eng;
  int math;
  int sum;
  float aver;
}
- 클래스를 만들고 객체를 인스턴스 한다.
- 객체 정의 타입은 주로 인스턴스 클래스를 사용한다. (여러객체를 인스턴스 해야하기 때문)
package study.oop.clazz;
public class Test02 { public static void main(String[] args) {
1
2
3
4
5
6
7
8
9
10
11
12
13
14
15
16
17
18
19
20
21
22
23
24
25
26
27
28
29
30
31
32
33
  Score s1 = new Score();
  s1.name = "홍길동";
  s1.kor = 100;
  s1.eng = 90;
  s1.math = 85;
  s1.sum = s1.kor + s1.eng + s1.math;
  s1.aver = (float) s1.sum / 3;

  System.out.printf("%s: %d, %d, %d, %d, %.1f\n", s1.name, s1.kor, s1.eng, s1.math, s1.sum,
      s1.aver);

  Score s2 = new Score();
  s2.name = "임꺽정";
  s2.kor = 90;
  s2.eng = 80;
  s2.math = 75;
  s2.sum = s2.kor + s2.eng + s2.math;
  s2.aver = (float) s2.sum / 3;

  System.out.printf("%s: %d, %d, %d, %d, %.1f\n", s2.name, s2.kor, s2.eng, s2.math, s2.sum,
      s2.aver);

  Score s3 = new Score();
  s3.name = "유관순";
  s3.kor = 80;
  s3.eng = 70;
  s3.math = 65;
  s3.sum = s3.kor + s3.eng + s3.math;
  s3.aver = (float) s3.sum / 3;

  System.out.printf("%s: %d, %d, %d, %d, %.1f\n", s3.name, s3.kor, s3.eng, s3.math, s3.sum,
      s3.aver);
}   }
3.3 메서드 정의
- 클래스로 객체를 정의하면 여러 메서드에 있어 장점이 생긴다
- 위의 코드에서 sum,aver,printf는 같은 형식을 사용 하고 있으므로, 메서드로 변형을 한다.
1
2
3
4
5
6
7
8
9
10
11
12
13
14
15
16
17
18
19
20
21
22
23
24
25
26
27
28
29
30
31
32
33
34
35
36
37
38
39
40
package study.oop.clazz;

public class Test02 {
  public static void main(String[] args) {

    Score s1 = new Score();
    s1.name = "홍길동";
    s1.kor = 100;
    s1.eng = 90;
    s1.math = 85;
    compute(s1);
    printScore(s1);

    Score s2 = new Score();
    s2.name = "임꺽정";
    s2.kor = 90;
    s2.eng = 80;
    s2.math = 75;
    compute(s2);
    printScore(s2);

    Score s3 = new Score();
    s3.name = "유관순";
    s3.kor = 80;
    s3.eng = 70;
    s3.math = 65;
    compute(s3);
    printScore(s3);

  }

  static void compute(Score s) {
    s.sum = s.kor + s.eng + s.math;
    s.aver = (float) s.sum / 3;
  }

  static void printScore(Score s) {
    System.out.printf("%s: %d, %d, %d, %d, %.1f\n", s.name, s.kor, s.eng, s.math, s.sum, s.aver);
  }
}
- compute 메서드는 Score의 객체안에서 수행할 수 있는 기능으로 Score로 이동한다.
- 이때 non-static 변수로 전환여 인스턴스된 객체의 this 레퍼런스를 사용한다.
package study.oop.clazz;
public class Score { String name; int kor; int eng; int math; int sum; float aver;
1
2
3
4
void compute() {
  this.sum = this.kor + this.eng + this.math;
  this.aver = (float) this.sum / 3;
}   }
//main 코드 //compute(s) ->s.compute();로 변경
3.4 접근지정자
- 패키지 이동
- Score 클래스는 메인 클래스의 형태와 계산을 보조하는 역할로 패키지를 구분 하여 준다.
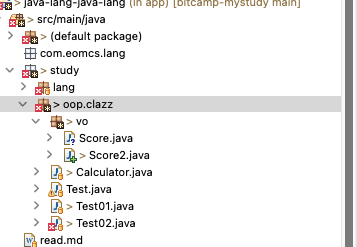
기존 변경 –study |- oop.clazz |- Test02.java |- Score.java –study |- oop.clazz |- vo(dto) | |- Score.java |- Test02.java 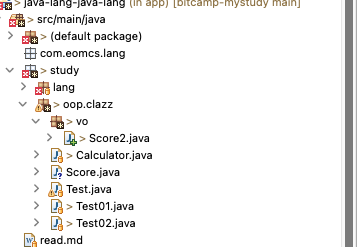
- 접근지정자
- 패키지가 달라지면 접근지정자에 따라 클래스에 접근하는 방법도 달라진다.
- 접근 등급을 나누어 클래스파일에 권한을 설정 하는 지정자를 접근 지정자라고 한다.
| 접근 지정자 | 현재 클래스 내부 | 동일 패키지 내부 | 하위 클래스 내부 | 전체적인 접근 가능 |
|---|---|---|---|---|
| public | O | O | O | O |
| protected | O | O | O | X |
| (default,생략) | O | O | X | X |
| private | O | X | X | X |
- Scored와 Test02의 패키지가 달라졌으므로 public 접근 지정자를 사용하여한다.
3.5 생성자
- 객체를 인스턴스하면 자동적으로 생성자가 생성된다.
- 객체 오버로딩을 통해 다른 타입의 생성자를 여러개 호출 할 수 있다.
1
2
3
4
5
6
7
8
9
10
11
12
13
14
15
16
17
18
19
20
21
22
23
24
25
26
27
28
package study.oop.clazz.vo;

public class Score {
  public String name;
  public int kor;
  public int eng;
  public int math;
  public int sum;
  public float aver;

  // 기본생성자
  public Score() {}

  // 생성자 오버로딩
  public Score(String name, int kor, int eng, int math) {
    this.name = name;
    this.kor = kor;
    this.eng = eng;
    this.math = math;
    this.compute();

  }

  public void compute() {
    this.sum = this.kor + this.eng + this.math;
    this.aver = (float) this.sum / 3;
  }
}
생성자를 오버로딩 하여 쓸 경우, main의 인스턴스 코드가 훨씬 간결 해진다.
package study.oop.clazz;
import study.oop.clazz.vo.Score;
public class Test02 { public static void main(String[] args) {
1
2
3
4
5
6
7
8
9
10
11
  Score s1 = new Score("홍길동", 100, 90, 85);
  Score s2 = new Score("임꺽정", 90, 80, 75);
  Score s3 = new Score("유관순", 80, 70, 65);
  printScore(s1);
  printScore(s2);
  printScore(s3);
}

static void printScore(Score s) {
  System.out.printf("%s: %d, %d, %d, %d, %.1f\n", s.name, s.kor, s.eng, s.math, s.sum, s.aver);
}   }
3.6 인스턴스 필드 접근 제한
- 접근지정자를 public으로 설정할 경우, 모든 클래스 파일에서 필드 값을 수정 할 수 있다.
- 이는 코드의 기초 데이터를 흔들기 때문에 접근지정자를 통해 접근을 제한하는 것이 좋다.
- 필드의 변수들의 접근은 인스턴스 메소드를 통해 접근 하는 것이 코드의 유지 보수성이 좋아진다.
- setter()에서 값을 다시 받으면 합계와 평균은 다시 계산 해주어야하기 때문에 compute()메서드를 추가한다.
1
2
3
4
5
6
7
8
9
10
11
12
13
14
15
16
17
18
19
20
21
22
23
24
25
26
27
28
29
30
31
32
33
34
35
36
37
38
39
40
41
42
43
44
45
46
47
48
49
50
51
52
53
54
55
56
57
58
59
60
61
62
63
64
65
66
67
68
69
70
package study.oop.clazz.vo;

    public class Score {
      private String name;
      private int kor;
      private int eng;
      private int math;
      private int sum;
      private float aver;

      // 기본생성자
      public Score() {}

      // 생성자 오버로딩
      public Score(String name, int kor, int eng, int math) {
        this.name = name;
        this.kor = kor;
        this.eng = eng;
        this.math = math;
        this.compute();
      }

      public void setName(String name) {
        this.name = name;
      }

      public void setKor(int kor) {
        this.kor = kor;
        this.compute();
      }

      public void setEng(int eng) {
        this.eng = eng;
        this.compute();
      }

      public void setMath(int math) {
        this.math = math;
        this.compute();
      }

      public String getName() {
        return this.name;
      }

      public int getKor() {
        return this.kor;
      }

      public int getEng() {
        return this.eng;
      }

      public int getMath() {
        return this.math;
      }

      public int getSum() {
        return this.sum;
      }

      public float getAver() {
        return this.aver;
      }

      public void compute() {
        this.sum = this.kor + this.eng + this.math;
        this.aver = (float) this.sum / 3;
      }
    }
- 메인 코드
1
2
3
4
5
6
7
8
9
10
11
12
13
14
15
16
17
18
19
20
 package study.oop.clazz;

    import study.oop.clazz.vo.Score;

    public class Test02 {
      public static void main(String[] args) {

        Score s1 = new Score("홍길동", 100, 90, 85);
        Score s2 = new Score("임꺽정", 90, 80, 75);
        Score s3 = new Score("유관순", 80, 70, 65);
        printScore(s1);
        printScore(s2);
        printScore(s3);
      }

      static void printScore(Score s) {
        System.out.printf("%s: %d, %d, %d, %d, %.1f\n", s.getName(), s.getKor(), s.getEng(),
            s.getMath(), s.getSum(), s.getAver());
      }
    }